My ancestor book is coming along -- slowly!! I have been expanding my Autumnal Mist Mini kit that I made back in September to create additional papers and elements for my ancestor book because I like the colors so much. You can see what I have so far in the Lawrence and Ada album in my gallery at HeritageScrap.
Of course, with the Holiday Season I needed to take a break from that. I found some old winter/Christmas photos which needed to be scrapped!! I've also become active in the challenges at DigiDesignResort. Every month they run 2 sets of challenges: 1 for a free mega kit and the other for a discount coupon. (What a great deal!!)
I haven't forgot about designing either! I made 2 Christmas mini kits in December. They are both available on my design blog - designsbyjmdt. One is Blue Christmas and was made for the SAS December Color Challenge. The other is Vintage Christmas and was made for the RAK Member Mega Kit Challenge.
Well, Happy New Year everyone!!
That's it for now!
~j

Thursday, December 31, 2009
Friday, November 20, 2009
Creating a Heritage Photobook - Part IV
The focus of this posting on photo books is design considerations when creating the layouts. It's good for me to get them written down so that I can go back to this post as a point of reference when creating books in the future.
First, due to the bleed and trim tolerances that are part of the printing process, it is necessary to be careful about placing elements too close to the edge. All journaling, titles, and captions as well as photos that should not appear cut off probably need to be at least an inch from the edge. In PSP, guidelines can be set up to mark the bleed and trim lines based on the spec from the publisher. (In the case of Shutterfly, I believe you can actually download templates with these lines already on them.) Further, if you create the layout as 12x12 and then plan to size down to 8x8, the "1 inch" margin needs to be set at 1.5 inches on the larger size in order for it to be 1 inch when sized down. So recommendation number one is to set up the bleed and trim guides before starting the layout.
Another thing I haven't mentioned before is the gutter. That is where the pages come together at the binding. In a perfect bound book, the pages will not lay flat. The binding and the curvature will obscure some of the inner part of the layout. This is yet another reason to keep the journaling, titles, captions and photos away from the edges.
The next design consideration is also related to the printing tolerances. It's probably a good idea to avoid using symmetric page borders. If the publisher doesn't trim the exact same amount from each edge, your layout will lose the symmetry, and it might look "off." This would include avoiding layouts in which a slightly smaller paper is centered and stacked on a larger paper for a page border. It might also include papers with borders built into the design. Just keep in mind when selecting the background papers how they would look trimmed - and since the backgrounds are extending to the bleed line, they are definitely going to be trimmed.
As a corollary to this, I would also avoid placing elements in such a way as to try to have them extend from the left hand page to the right. If the page trimming isn't exact enough, you may see a noticeable shift up or down and the result would look sloppy - like fabric stripes that don't line up at the seams!
The next few items may be more of personal taste, but in general I tend to prefer the subjects of the photos to face toward the center of the book (in the case of one or two large photos) or the center of the page (if using many smaller photos on a page). This is why it's nice to know if you are working on a left-hand page or a right-hand page when you are working on the layout. That way you can use appropriately oriented photos - or since we are working digitally, mirror the photo. Similarly, if I were working on a left-hand page and had text or journaling adjacent to the gutter, I would right-justify the text so that the jagged side would face the outside. But again, this may be more of a personal preference and not a hard and fast rule.
These are the design considerations that come to mind as I write this. There may be others, but these are the main things I want to keep in mind as I create the page layouts.
Well I think the topic of photobooks is pretty well exhausted! After I get mine done and printed I will try to write a follow-up on how it turned out. By the way, I have all but decided to use Shutterfly for the publisher. So we will see how it goes.
That's it for now.
~J
Thursday, November 19, 2009
Creating a Heritage Photobook - Part III
In this post I wanted to talk about the way I have chosen to help me design the layout of the book. Back when I was working on the yearbook for my children's elementary school, we used a ladder diagram to define what would be on each page. Here's how it works. Draw a vertical line down the center of a piece of lined paper. (Or set up a 2 column document in a word processor.) The left column represents the left-hand side pages and the right column represents the right-hand side pages. Typically you would start numbering the ladder diagram with page 1 on the top line of the right-hand column, then page 2 and 3 on the next line, continuing on with even numbers on the left and odd numbers on the right. However, before you number the lines, double check how it's done with the publisher you chose. Lulu, for example, counts what would normally be page 1 as the title page and it is not counted as a "photo" page. In this case, page numbering starts with the first double page spread. Thus in this case, odd numbers are on the left and even are on the right. On the other hand, Shutterfly and Snapfish do not give you a special title page. The very first page is actually your first photo page and the double page spreads begin with pages 2 and 3. The bottom line is that you need to number your ladder diagram in accordance with the method used by the publisher you have selected.
Once you have a ladder diagram with the appropriate page number scheme, it is time to decide the content of each page. Just jot a quick description next to the page number. Of course, as you're doing this, you should be thinking in terms of the story you want to convey with your layouts and the photos and/or journaling that you have available. If you think that some topics will need two pages, try to organize the book so that those two pages fall together on a double page spread. At the end of this process you will have a road map that you can follow as you create the actual layouts. Of course, flexibility is important and the ladder diagram is not written in stone. You may need to make some adjustments and changes as you go along. But I find that using a ladder diagram as a tool, helps to keep me focused and provides me with a clear idea of what layouts still need to be done.
There are a couple of design considerations that I want to record here, so I guess there will be a Part IV to this blog topic!
That's it for now.
~J
Wednesday, November 18, 2009
Creating a Heritage Photobook - Part II
This post is a continuation of my previous post - Creating a Heritage Photobook - Part I. This post focuses on the part of the process dealing with deciding what scrap booking kit(s) to use and some things to consider with regard to that. I will then follow up with a third post to discuss a method for planning the book layout.
As I mentioned in an earlier post, for my Heritage book I have decided that I want it to have a cohesive look, and so I am leaning toward using one large mega-kit to build all of the pages. That way the book will hopefully have a cohesive, coordinated look, but still have variety. Another way to achieve this, as ForgetMeNots pointed out in a comment to my earlier post, is to choose multiple kits by the same designer, since many designers have a particular style that carries through in their various kits. Just to expand on that idea, if the colors aren't quite right, elements and/or papers could be recolored to coordinate.
Another thing to be aware of when choosing the kit(s) is the designer TOU. While I am starting to see more kits marked S4H/S4O (scrap for hire/scrap for others) friendly, many are PU (personal use) only. If you are planning on only printing out one book for yourself, personal use kits would be okay to use. I am thinking in my case, however, I would need the kit I use to be S4H/S4O friendly. Since the Heritage book I am making will focus on the lives of my grandparents and their ancestors, it may also be of interest to my aunts, uncles, siblings, cousins and possibly other relatives. And I would want them to be able to have copies should they want one. I would think that making additional copies of a photobook or even just a single layout or two would fall under the S4O (scrap for others) category. (Particularly if the recipient is paying the copying fees.)
It is my understanding that if you want to use a kit marked for personal use kit as I described above (i.e. making copies of layouts for others), you would have to contact the designer to see if she (or he) will allow it. It is possible that the designer will ask you to purchase a commercial license. This whole issue of licensing and commercial use vs. personal use is actually another reason why I am thinking about designing my own kit for the book I am making. Then I won't have to worry about copyrights, terms of use, commercial licenses or any of the legal stuff if later on down the line a relative would like a copy of one or more of the pages.
That's it for this post. I'll follow up with more on the planning the book layout later.
~J
Tuesday, November 17, 2009
Creating a Heritage Photobook - Part I
As I'm getting closer to putting my Heritage Photobook together, I thought I would record the process. This way I can go back and read it to refresh my memory when I want to make the next one! LOL! First off, I've been checking out some different photobook publishers and have found that different publishers offer different page sizes. That isn't to say that there isn't some overlap, but there are definitely different dimensions, particularly as you move away from a square format. Thus, in general, it is probably a good idea to evaluate and choose a publisher before creating layouts.I have narrowed my choices down to two or three and will probably post here when I make a final choice. I have decided on a nominal 8x8 square format, and all the publishers I am looking at support that size.
The second thing to be aware of is trim and bleed. I knew from my many years working on the elementary school yearbook that this was going to be a factor. Many of the complaints that people have deal with designs being cut off and/or white bands along the edges. This is because of the page trimming tolerance, possibly as much as 1/4 of an inch. This means that design might shift up, down, left or right by this amount. To avoid white bands, the background design paper needs to extend out each direction by this amount - that would be the bleed. The other part to this is that key elements of the design, and especially journaling, cannot fall outside of the potential trim area. If it does, it might possibly be cut off. All the publishers I'm looking at tell you their particular trim and bleed tolerances. Some even provide templates so you can see how far to extend your background papers as well as the limits of where to put your design.
So to recap, the first steps are to decide on the size and dimensions of the book, choose a publisher, and then to get the bleed and trim tolerance from the publisher. The next part of the process is to make decisions about the book content: which kit(s), how many pages, and what to include on each page. I'll break here and cover
those topics in Part II.
That's it for now.
~J
Monday, November 16, 2009
A Digi Scrapbook Site Worth Checking Out
There are tons of digital scrapbooking sites/stores on the internet. Many offer monthly challenges in which for just participating you can earn free mini-kits or store discount coupons. In the past year, I checked out a few of them and participated here and there. Recently I stumbled onto one that I think is really worth checking out. I think I first found DigiDesignResort by following a link on someone's blog. (Sorry, can't remember which blog. I tend to blog hop a lot - LOL!) The thing that is pretty cool about this site is that for participating in only 6 challenges you can get a free (full-sized) collab kit! Just six layouts, and a free kit! How cool is that! That's not all. They have a second set of six challenges which earn you a discount coupon to their store!
Now, to be honest, this is the first month that I have participated in the challenges at DDR. So far I have done 5 of the first set (so just one more for the free kit) and two of the second set. I'm anxious to actually get the free kit and check it out. This site also hosts scrapbooking design classes, so I am hoping that the quality of the free kit is going to be pretty high. Also, based on the preview, it looks like it is my style. (I like realistic elements over the cutesy.) It definitely should be usable for the vintage style layouts I like to do.
That's about it for now.
~J
Thursday, October 22, 2009
Catching Up
Well, it looks like I neglected this blog for way too long!! Obviously the SAS designer contest is over and three very deserving designers now have stores there. It's well worth heading over to SAS and checking it out!
It's been a busy time around here, and although a couple of days ago I posted a new mini kit called Autumn Days on my design blog, I actually haven't done much scrapping or designing. I am currently working on a another batch of old photos that I got from my Mom. Mostly they are of her and her siblings as they were growing up, but there are also some of my Dad's side and even some of my brother and sister and I when we were young. I am scanning them and trying to organize them on my computer. (The scanning is taking forever!!) Many are in a small, square snapshot format, so I am scanning at a very high DPI with the hopes that I will be able to capture enough detail to enlarge them for scrap book layouts. There are also some old Polaroids which have gotten very dark. Hopefully I can lighten them up a bit in PSP so that they will be usable too!
I still have hopes of creating one or two photo books before the holidays. I've more or less dropped out of the Lifebook series over at HeritageScrap. There are a couple of reasons. First, I am thinking a photo book will look much more polished if the pages are made from the same kit. It would have to be a fairly large kit, however, so the exact sames papers and elements would not have to be repeated over and over and over. I am thinking about putting together my own kit for this and doing that would take some time. Second, I am thinking more of making a photo book than a life story book. Practically speaking, photo books (or printing photos to add to an album) are somewhat expensive, and I would rather spend the money on layouts containing primarily photos rather than layouts containing primarily words.
Well, that's about it for now. I still have to run some errands before the kids get home from school!!
Thursday, September 17, 2009
September Challenges and Contests and a New Blog
In the digital scrapbooking world, I mostly hang out at three sites (in alphabetical order): HeritageScrap, RAKScraps, and StoneAccentsStudio. So I just thought I would post a little update on what's going on at these sites.
Over at RAKScraps, the monthly Mega kit has just been released and is available free to members until the end of the month. At the time of the mega kit release, they post the color palette and theme so that members can make coordinating kits. Mine is called Grungy Graffiti Girl and is available on my new design blog - designsbyjmdt. Click the link to hop on over and check it out.
SAS is continuing with their birthday bash. Voting should be in for the second round of their designer contest tomorrow. The field will then be narrowed down to 19. In the end, the top 3 designers will get stores at SAS. Hop on over there to pick up all the free minis the perspective designers are creating. In addition to the birthday celebration, they are also running their monthly challenges. I am hoping to finish up a mini for the color challenge soon, so check back for that.
At HeritageScrap they are starting up their second Lifebook Challenge. Each week you scrap a different aspect of a person's life and at the end you have a book chronicling the subject from birth on. This is the first week and the project is the cover. I haven't started mine, but am thinking I will probably join in this time around - just have to decide on the subject of the Lifebook. Now that I am posting my kits elsewhere, I will probably be posting more of my layouts on this blog, so that would include my Lifebook layouts.
That's about it. Check back soon.
Thursday, September 3, 2009
Kit for SAS Birthday Bash
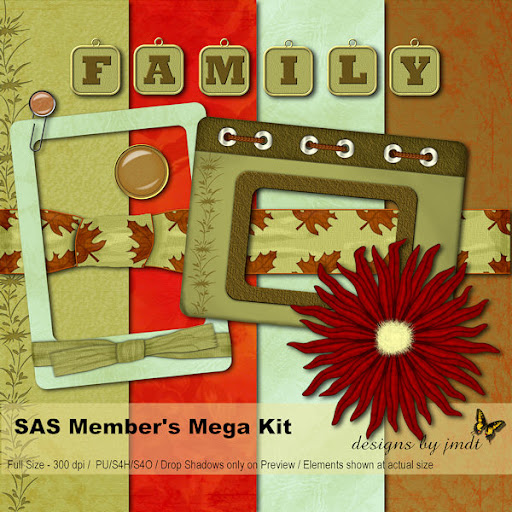
Over at Stone Accents Studio they are celebrating their birthday -- I think it's their second birthday. They are having a lot of games and challenges and also a big contest for new designers. I did not join in the contest, but the ladies that have are posting some awesome mini-kits. You can go on over to the gallery at SAS and check them out and snag them for free.
In addition to the designer contest, they are having a Member's Mega Kit challenge. I decided to make a mini-kit for that. So far there aren't many contributions to the Member's Mega Kit, but I expect more people will contribute as the month goes on.
If you would like my mini-kit, download here. (Sorry - freebie retired)
Hope you like it and don't forget that you can hop over to SAS for lots more goodies!
In addition to the designer contest, they are having a Member's Mega Kit challenge. I decided to make a mini-kit for that. So far there aren't many contributions to the Member's Mega Kit, but I expect more people will contribute as the month goes on.
Hope you like it and don't forget that you can hop over to SAS for lots more goodies!
Sunday, August 23, 2009
Art Studio - A mini-kit Freebie
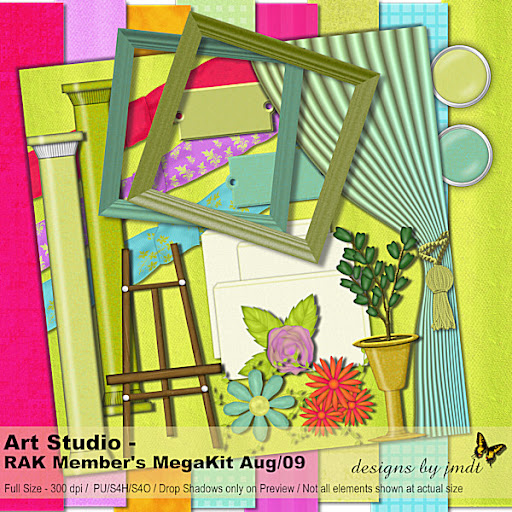
Here is another free kit -- this one was made for this month's RAK Member Mega Kit challenge. The theme this month was Art / Art supplies. I decided to do something a little different and make elements that you might find in an art gallery or art studio. There are 8 papers and 20 elements - all made in PSP. The preview is below. By the way, if you go to the RAK Scrapbook site, you can join for free. Each month they have a free Mega Kit. After the Mega Kit is released, they post the color palette and theme so that members (like me) can make and post additional coordinating kits.
In order to keep the zip file size down, I had to upload the kit in three parts: elements1, elements2, and papers.They can be downloaded with the links below. You can choose to download from 4shared or mediafire.
elements1 - 4shared
elements2 - 4shared
papers - 4 shared
OR
elements1 - mediafire
elements2 - mediafire
elements3 - mediafire
Sorry - freebie retired.
As always, please let me know if any of the links are broken. Also, I guess I have never mentioned this before, but if you create a layout with this kit or any of my other freebies, I would love to see what you've made. If you post to a gallery, feel free to email me a link.
Enjoy the kit!
In order to keep the zip file size down, I had to upload the kit in three parts: elements1, elements2, and papers.
Sorry - freebie retired.
As always, please let me know if any of the links are broken. Also, I guess I have never mentioned this before, but if you create a layout with this kit or any of my other freebies, I would love to see what you've made. If you post to a gallery, feel free to email me a link.
Enjoy the kit!
Friday, July 24, 2009
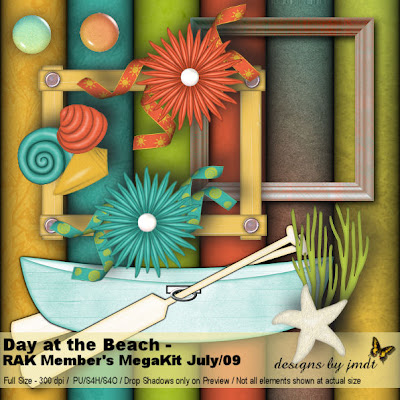
A Day At the Beach -- Freebie Mini-Kit and QP
I noticed that over at RAKScraps their theme this month is beach/ocean breeze/etc, so I decided to participate in their Member MegaKit Challenge. At first I wasn't sure about the color palette, but I must say that it really grew on me!! The kit I made is pictured below.
Download from 4shared
OR Download from mediafire
Sorry - freebie retired
Whenever I make a kit, I always like to give it a "test drive" to check it out -- make sure the elements aren't too small, see how things go together, etc. And so here is the quickpage that I made with the kit. There is plenty of space for journaling and personalization.

Download from 4shared
OR Download from mediafire
Sorry - freebie retired.
Hope you like it!
Sorry - freebie retired
Whenever I make a kit, I always like to give it a "test drive" to check it out -- make sure the elements aren't too small, see how things go together, etc. And so here is the quickpage that I made with the kit. There is plenty of space for journaling and personalization.
Sorry - freebie retired.
Hope you like it!
Sunday, June 28, 2009
PSPU - senior lesson
One of the things I did not mention in my last post was that I was taking lessons through the PSPU yahoo group. I started in the spring and made it through the freshman, sophomore, junior and half of senior lessons before I had to take a break because of the slide show. I just recently went back and finished up the senior lessons (still need to take the final), but I wanted to show you the layout I made for the last lesson. Most of the elements on the layout were "drawn" by me in psp except for some of the flowers which I tubed from a photo. As for the background, the sky/cloud background and the bricks are patterns included in psp. In addition, the textures I used on the grass, mulch and patio were also part of the program. The elements, including the staircase, window, flower box, trellis, birdbath/fountain, birdhouse, table and chairs, were the parts that I made. I was very happy with how it all came out and really wanted to share it on this blog. Between PSPU and some other tutorial sites, I have learned quite a few new techniques and am anxious to get working on a new kit.

Saturday, June 27, 2009
Catching Up: Slide Show, Contest, etc
I can't believe how long it has been since my last post! It has been a very hectic time. Most of May I was consumed in putting together a slide show. Let me explain. For several years I have been the parent volunteer in charge of my children's elementary school yearbook (some years by myself and some years with partners). Since this was my youngest's last year at the school, it was also my last year for the yearbook. Well, the yearbook went to the publisher in April (it came out awesome by the way!!), and about that time I was asked about putting together a slide show for the end of year awards ceremony and also the end of year party. Since I have been taking digital photos of the kids the past five years for the yearbook, I had tons of pics. In order to have a lot of pictures of all the students in the class and still keep the length of slide show to about 10 minutes, I had to "scrap" the pictures to include multiple photos on each slide. This became a HUGE job!! I will probably shortly write a separate blog entry on how I did the slide show and the lessons learned since I had such a hard time finding information online. Fortunately, the slide show was finished on time and was a big hit with the students, parents and school staff. (Yeah!)
So after the slide show was finished in the beginning of June, it was on to fixing some computer problems. My older son's computer has a very serious virus and we still don't have it running, but we have managed to salvage what he needed from the hard drive. Then it was time to try to get the wireless network printer to work again. It stopped talking to the computers after a short power outage in mid-May. Luckily, I was able to get that working in spite of the lack of help from HP technical support - who informed me it's out of warranty! So with the printer back up and running there was partial success on the computer issues! I also needed to catch up on some genealogy correspondence and postings, and I really, really wanted to get back to scrapbooking - both layouts and design.
Earlier in May, before the slide show completely took over, I posted a layout at SAS for their heritage layout of the month contest. I was absolutely thrilled to find out I won the challenge and got a gift certificate to their online store!!! So, I think on that note, I'll end this rambling and post the layout below. The kit used is LilyPond - a free a SAS welcome kit. The photo is four generations of my Evans/Shaner/Miller line. The man holding the baby is my great-grandfather, Harry Evans. Standing next to him (probably on a box to make her taller) is his wife, Minnie Shaner Evans. Next to Minnie is her mother, Adeline Miller Shaner. Seated in the front is Adeline's step-mother, Elizabeth Fritz Miller. The baby is Harry Evans Jr. and the little girl is Cora Evans. They are the older siblings of my grandmother.
Tuesday, May 12, 2009
I Was Tagged!
I have just noticed that I was tagged by Lori Ruth. It is all about answering questions about yourself and then tagging some others to do the same. Well, here goes:
8 Things I'm Looking Forward to:
1) My son's prom later this month!
2) My youngest's end of year "Movin' Up" party (which I am helping to organize)
3) All the other end of school activities that are coming up
4) Seeing some long distance relatives this weekend that I haven't seen for several years
5) Our summer vacation
6) A weekend trip with just me and my daughter
7) Getting the elementary school yearbook back from the publisher (I was one of those in charge of putting it together)
8) Hearing from distant and not so distant relatives that stumble onto my genealogy website
8 Things I did yesterday (Well, this is going to be kind of boring!!)
1) Finished up the "final" for an online class I'm taking
2) Packed lunches for the kids
3) Picked up my youngest from school and chatted with the other Moms
4) Vacuumed, laundry, dishes (etc)
5) Made Dinner
6) Sorted mail, paid bills
7) Surfed the internet
8) Watched 24
8 Things I wish I could do
1) Find a local geo-caching buddy
2) Convince my kids to keep their rooms (and the rest of the house) clean
3) Break through some of my genealogy "brick walls"
4) Travel more
5) Find a great paying part-time job that would work around the kids' schedules
6) Afford to send my kids anywhere they would like for college without cost being an issue
7) Hire a cleaning lady!
8) Win the lottery (big time)!
8 Things or shows I watch
1) 24
2) Brothers and Sisters
3) Numbers
4) Desperate Housewives (sometimes)
5) CSI (sometimes)
6) Good Morning America
7) The O'Reilly Factor (sometimes)
8) Grey's Anatomy (sometimes)
Now I'm supposed to tag some other people, but unfortunately I'm not sure who to tag. (I think that Lori Ruth already tagged most the people I know!!) So I'll check around some other blogs and come back and do this if I can find some people who haven't already been tagged.
Sunday, May 10, 2009
Dusty Rose - My SAS May Color Challenge Mini-Kit

I've been busy working on another mini-kit. This one is called Dusty Rose. I made it for the May Color Challenge at SAS. I just loved the colors Boo (the challenge coordinator) chose! This kit has lots of lace, lacy bows and ribbons. There are also 2 frames, several flowers, a flower cluster and other elements, as well as 6 papers. Hope you enjoy it!!
Friday, May 1, 2009
Check out the Beautiful Tag from Robin!

I am so excited to post this!! Robin of Rosewood Creations, one of the ladies in our DWR group, made a tag from bits and pieces of everyone Happy Spring Blog Train kits --- and to top it off, she offered to personalize them for us! Isn't it gorgeous!!! Thanks so much to Robin for this lovely gift!
Wednesday, April 22, 2009
A Layout with my Asian Inspired Kit
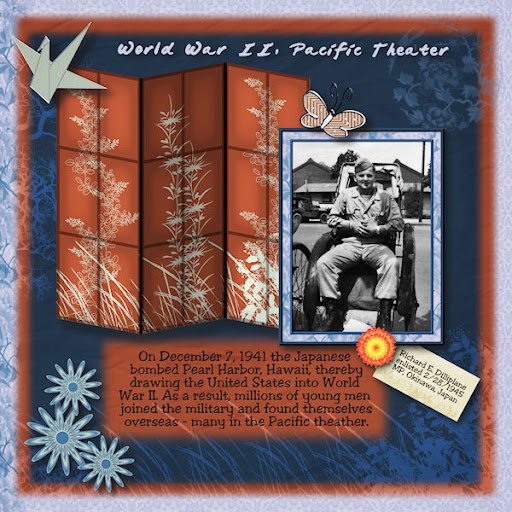
Lately I have been so caught up in designing that I haven't made any layouts in a while. So I decided I needed to do something about that. As a result, I made this somewhat non-traditional heritage military page with my Asian Inspired mini-kit. The photo was one of the few Asian-themed ones that I have, so I thought it kind of fit!? I also want to scrap a page with the Happy Spring kit. I have an Easter photo from a few years ago that I think will work great -- now I just need to find it and scan it!
Tuesday, April 21, 2009
Asian Inspired Mini Kit

I didn't think I would have it ready this soon, but here is my Asian Inspired Kit which I created for the RAK member's kit challenge for April/May. It is another mini-kit with 4 papers and 10 elements.
Monday, April 20, 2009
The DWR Happy Spring Blog Train is Here!

Well guys, it's here! (Well almost, the actual date is April 21, but I'm posting a few hours early.) The DesignWithRene group has put together a Spring themed blog train. My part is pictured above and can be downloaded with the links below. There are 8 papers and 20 elements, so they have separate download links.
Sorry - freebie retired.
And here are the links for the other blogs. BTW, I've seen some of the previews and they are awesome!
Bateau-Maison Creations
Digi Cyber Scraps
LD's This 'n That
My Digital Diversion - You are Here
Starfire Designs
VanJo Designs
Hope you enjoy the Happy Spring kit. I am working on an Asian Inspired mini-kit that should be ready in a few days. Be sure to stop back and check that one out too!
Sunday, April 12, 2009
Filigree Frame Pack - Freebie
Happy Easter to everyone that stops by! Here is a little Easter gift. I needed an antique-looking filigree frame for a page I was working on and came up with these. There is one miniature circle, one regular circle, two rectangles and a square. Unfortunately, the preview doesn't really do them justice. The rectangular and square frames are quite a bit larger than shown.

If you like them feel free to download from 4shared or mediafire. Sorry - freebie retired.
Saturday, April 11, 2009
Fairies in Blue - Mini Kit
I know I haven't posted for a while, but hopefully that will get better. The school project I was working on is almost done, and I should have more time for scrapbooking now. In the meantime, I have participated in a few challenges and posts at some of the sites I belong to. I made the mini kit shown below for the March-April RAK members challenge. I also haven't forgotten about the award I need to pass on and will be doing that soon also.

If you would like you can download it from 4shared or mediafire. Sorry - freebie retired.
Thursday, March 26, 2009
I got this beautiful Award!

WOW! I feel very honored to receive the Prémio Dardos award from Lori Ruth of BateauMaisonCreations! Thank you very much Lori Ruth! She has some beautiful things on her site for you to download, and lately she has posted several free PSP scripts! You can check out her site at the above link.
Here are the conditions to this award:
Premio Dardos Award
The Premio Dardos award acknowledges the values that every blogger shows in their effort to transmit cultural, ethical, literary, and personal values every day.
The rules are:
1) Accept the award, post it on your blog together with the name of the person that has granted the award and his or her blog link.
2) Pass the award to other to 15 blogs that are worthy of this acknowledgment. Remember to contact each of them to let them know they have been chosen for this award.
I will be passing this award on, but it may take several days. I am currently really immersed in finishing up the yearbook for my youngest's elementary school. The good news is that the deadline is almost here, so one way or another it will be done!!!
Sunday, March 22, 2009
My First Mini Kit Freebie!!
Wow!! I can't believe it! I have made a mini-kit called Easter Egg Hunt for the March Color Challenge at SAS - StoneAccentsStudio. They provided a color palette and the challenge was to make a mini-kit or elements using those colors. And I actually gave it a try! There are 6 papers, 2 mats, and 5 each ribbons and bows. Also, there are some buttons and a glass stone circular frame. The kit is 300 dpi and the papers are full-size (12x12).
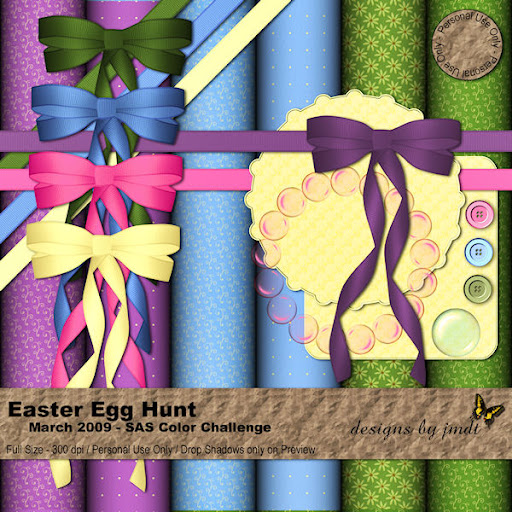
You can download it here. Sorry - freebie retired.
As a bonus, I also made a quickpage using the mini-kit. The quick page is 12x12 and can easily be sized to 8x8. Here is the quick page preview.
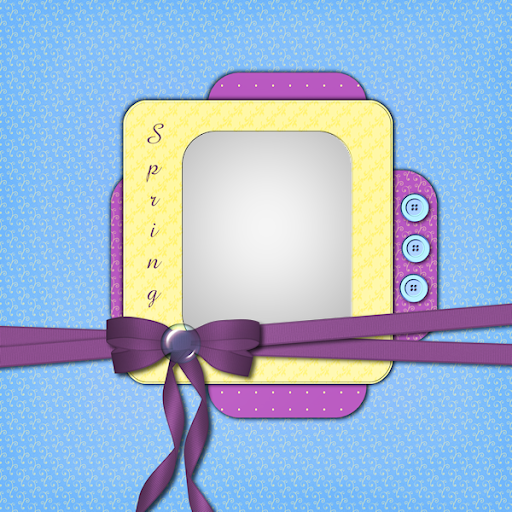
The quick page can be downloaded here. Sorry - freebie retired.
As a bonus, I also made a quickpage using the mini-kit. The quick page is 12x12 and can easily be sized to 8x8. Here is the quick page preview.
Friday, March 20, 2009
Blog Train Update
Just wanted to post an update on the blog train I joined that I mentioned in an earlier post. It was originally set for today, but it has now been delayed until April. I will let you know the exact date soon. In the meantime I am working on a small freebie kit to post here. I hope to have it ready in a few days. This is exciting for me, as it will be my first attempt at putting together a kit! I was originally hoping to have it ready today in lieu of the blog train, but I have been busy working on the yearbook for my youngest's elementary school. Thankfully, that will be done soon -- I enjoy it, but it's a big job! Anyway, check back in a few days for my kit!
Wednesday, March 4, 2009
International Women's Day

I got this beautiful gift for International Women's Day from Fran, a new friend that I have just recently met. Pay her a visit, she has a very nice site. I would like to invite anyone reading this post to grab this very lovely gift for themselves.
Tuesday, March 3, 2009
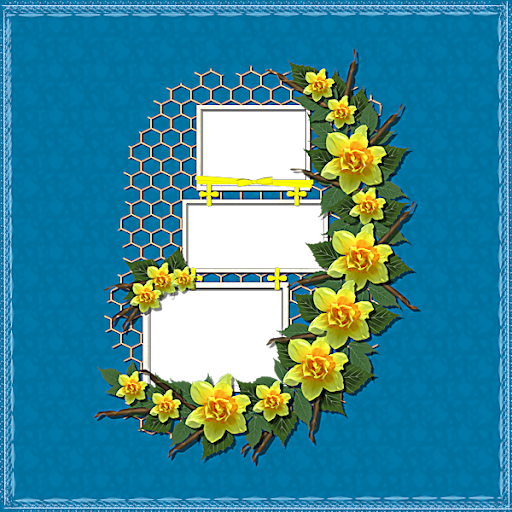
Spring Blog Train is coming!
I can't believe this, but I joined a blog train!!! More information will follow, but it is planned for March 20th and the theme is Spring. This will be a huge deal for me as I haven't done anything like this before. I am working on a mini-kit for my part. There will be some papers, elements, and a couple of quick pages. Here's a preview of one of the quick pages. I hope you like it.
Friday, February 27, 2009
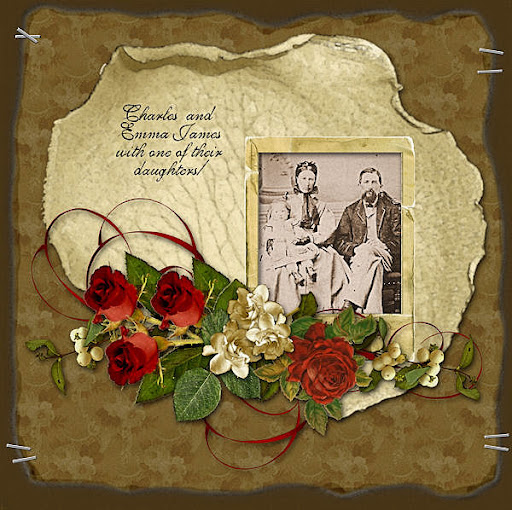
Vintage Layout with Patterned Paper
I just learned a very easy way to make patterned paper from the tutorial posted at CountryDreamzScrappin by Joani. I tried it out with a snippet of vintage wallpaper from the GraphicsFairy. To complete the layout, I 'stapled' the patterned paper to a background page and then added a cluster frame from RaspberryRoadDesign along with my photo and journaling. The result is the layout posted below.

Thursday, February 19, 2009
Up and Running - Finally!!
Well, it's taken longer than I hoped, but I finally have a custom background and header I can live with! (at least for a while) It was a pain to get things centered and figure out colors, etc. I found some sites that had some beautiful blog layouts available for downloading and seriously considered using one of them. But in the end, I decided that I really wanted to make my own. So it took a little longer, but now it's done and I can finally get back to making more layouts for the ancestor book I am working on. I also want to get more into designing some custom elements and backgrounds for my layouts. We'll see how it goes....
Sunday, February 15, 2009
Under Construction
This blog will be dedicated to my digital scrapbooking addiction. Please bear with me while I get it up and running.
Subscribe to:
Posts (Atom)